|
|
|
Welcome to my screen capture tutorial page. This is where it all started for me. After discovering the joy of "flying the sims" I found another outlet. That of course was making web pages. I like to watch the things create work on the computer (and I go bonkers when they don't). I can toil around for hours on end tinkering and testing. I guess that makes me some form of a geek. Well so be it then. You don't have to be a geek, however, to enjoy capturing scenes from your flights and converting them into nice pictures suitable for framing (at least in html anyway, the captures are notoriously low rez). Just follow the instructions here and enjoy. Take the shot!
Fig.1 shows the main screen of "Screen Capture Deluxe 7.0" Why do I use this paticular software? Good question. Honestly, it was in the right place at the right time. It's also pretty cheap and available through download from Broaderbund.com. Anyway you do not need to concern yourself with any of those buttons except for the first one on the left. <print screen> All you need to do is fire up the sim, fly around in any aircraft with the weather and time set up to your liking. You are going to be flying outside of the plane so you can see the scenery. Now I recommend hitting pause (p) when you arrive at a nice shot. You can move around the aircraft using the view commands or your joystick to get it just right. When you are there hit <print screen> (sometimes <prt sc> or some other varient). This will capture whatever is on screen at that moment and put it up in the main window of the capture program. Before you take the screne shot make sure the capture program is minimized or it will capture itself. Do not edit the photo in this program. If you have Photoshop or Photoshop elements save it as a PSD. If not, you have some other choices. Pick either .jpg or .gif. I found the .tiff to be rather troublesome when generated form this particular program. You can save as many captures as you like and save each with a different name in the same folder. When you are through taking snapshots, close Screen Shot Deluxe. It has done it's job. It is time to move on to the editing stage in Photoshop. Any good image editor will do, but I like Photoshop. The initial Capture:
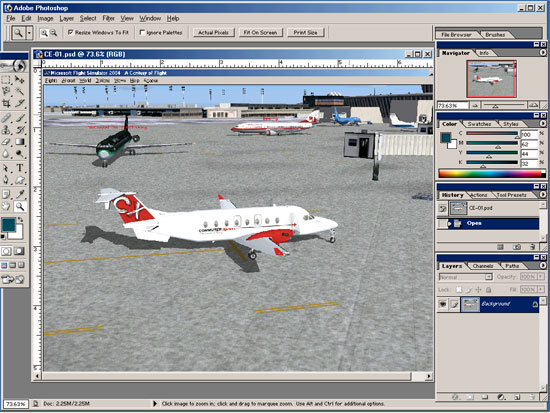
In Photoshop open the PSD file that you created. What you get is something like in Fig. 2. This is the raw shot and contains everything that was on the screen at the time of the capture. That's okay because we can crop it any way we like. Crop and touch up.
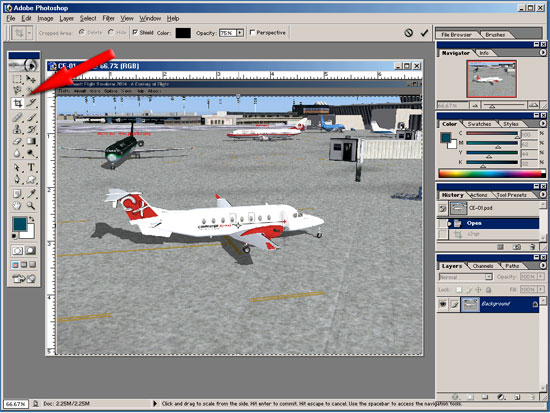
The arrow in fig. 3 is pointing to the crop tool. This works by selecting the tool as shown, drag out a box with the mouse to the desired size. You can use any of the six adjustment handles on the crop marquee to fine tune it just the way you want it to look. When you have it placed right just hit <enter> and the elements outside of the box will be discarded and you will have a nice cropped picture. This is only the beginning. Next we do some touch ups! Note: Having the screen capture program running in the backgroud while the flight simulator is running can eat up alot of memory and processing power. You will need a pretty good computer to get it right. Don't be discouraged however, at the time of writing this I am using an old Gateway 1000 with Windows ME! I juiced up the machine with an extra hard drive, double the ram to 512, and a better video card (64 megs). If you have anything better than this (and these days it isn't hard to) you will be just fine. |